 American car Papercraft
①Exterior Assembly
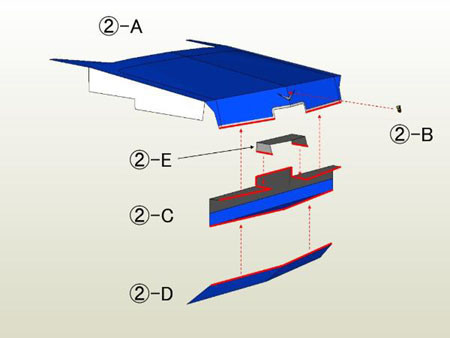
From here, use the "B part". Assemble around the rear trunk.
②-B is a very small part so, please be careful.
②
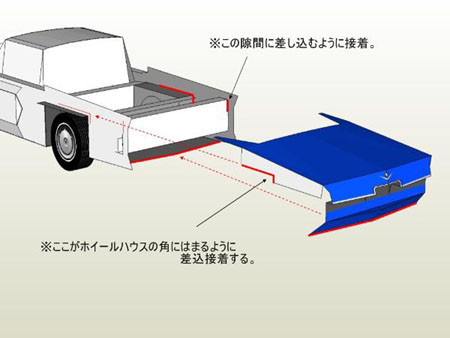
Inserting the glue between both parts of the body reinforcement.
Did you like this?
③
The figure illustrates an example of body parts attached to the left.(Assemble the right side as well.)
If necessary, please add a margin to make it easier to produce a piece of paper, etc..
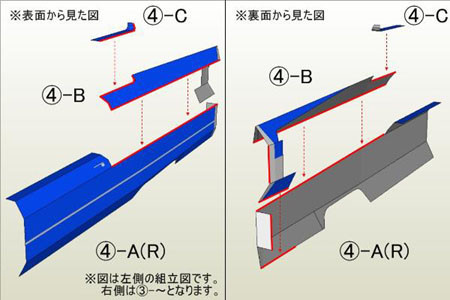
④
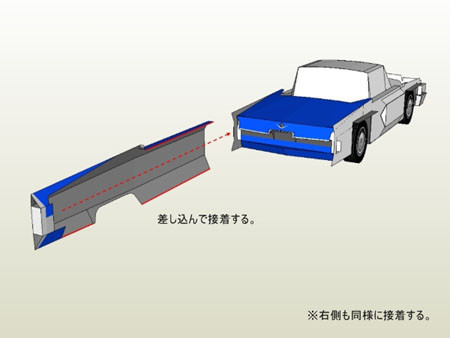
Into the side of the reinforced section.The assembly diagram for the example of the left, is described.
The same is true on the right.
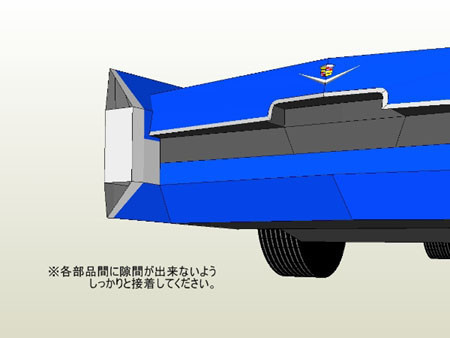
The gap between the parts can not be made, please insert the firm.
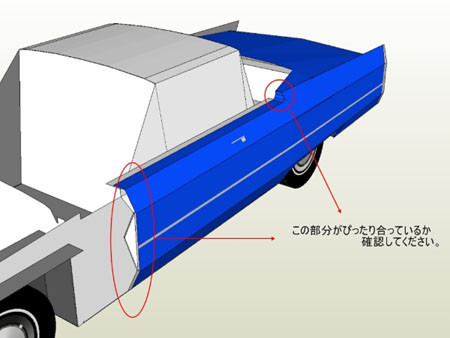
The checkpoint is part of the illustrated.Must be firmly aligned here.
⑤
